
Putting on Compression Stockings: A Step-by-Step Guide
Compression stockings do a lot more than just squeeze your legs. Doctors say they can reduce swelling, help prevent blood clots, and improve circulation when worn correctly. Most surprising is that nearly 30% of people who try compression stockings end up quitting because they struggle with getting them on. The real secret is knowing that a few easy techniques can make putting them on almost effortless and way more comfortable than most people expect.
Table of Contents
- Step 1: Gather Your Materials And Prepare
- Step 2: Position Your Body Comfortably
- Step 3: Slide On The Stocking From Toe To Knee
- Step 4: Adjust For Comfort And Fit
- Step 5: Verify Proper Placement And Compression
Quick Summary
| Key Point | Explanation |
|---|---|
| 1. Gather materials before starting | Collect clean stockings, gloves, powder, and a mirror to ensure a smooth application process. |
| 2. Position your body comfortably | Sit in a sturdy chair with back support and feet flat to maintain stability and proper alignment. |
| 3. Slide stockings on correctly | Gather the stocking and slide it on smoothly from toe to knee without pulling or yanking. |
| 4. Adjust for comfort after application | Smooth wrinkles and ensure even distribution for optimal compression, avoiding tightness or pinching. |
| 5. Verify placement and compression | Check for smooth fabric and consistent pressure to confirm effective therapeutic support for your legs. |
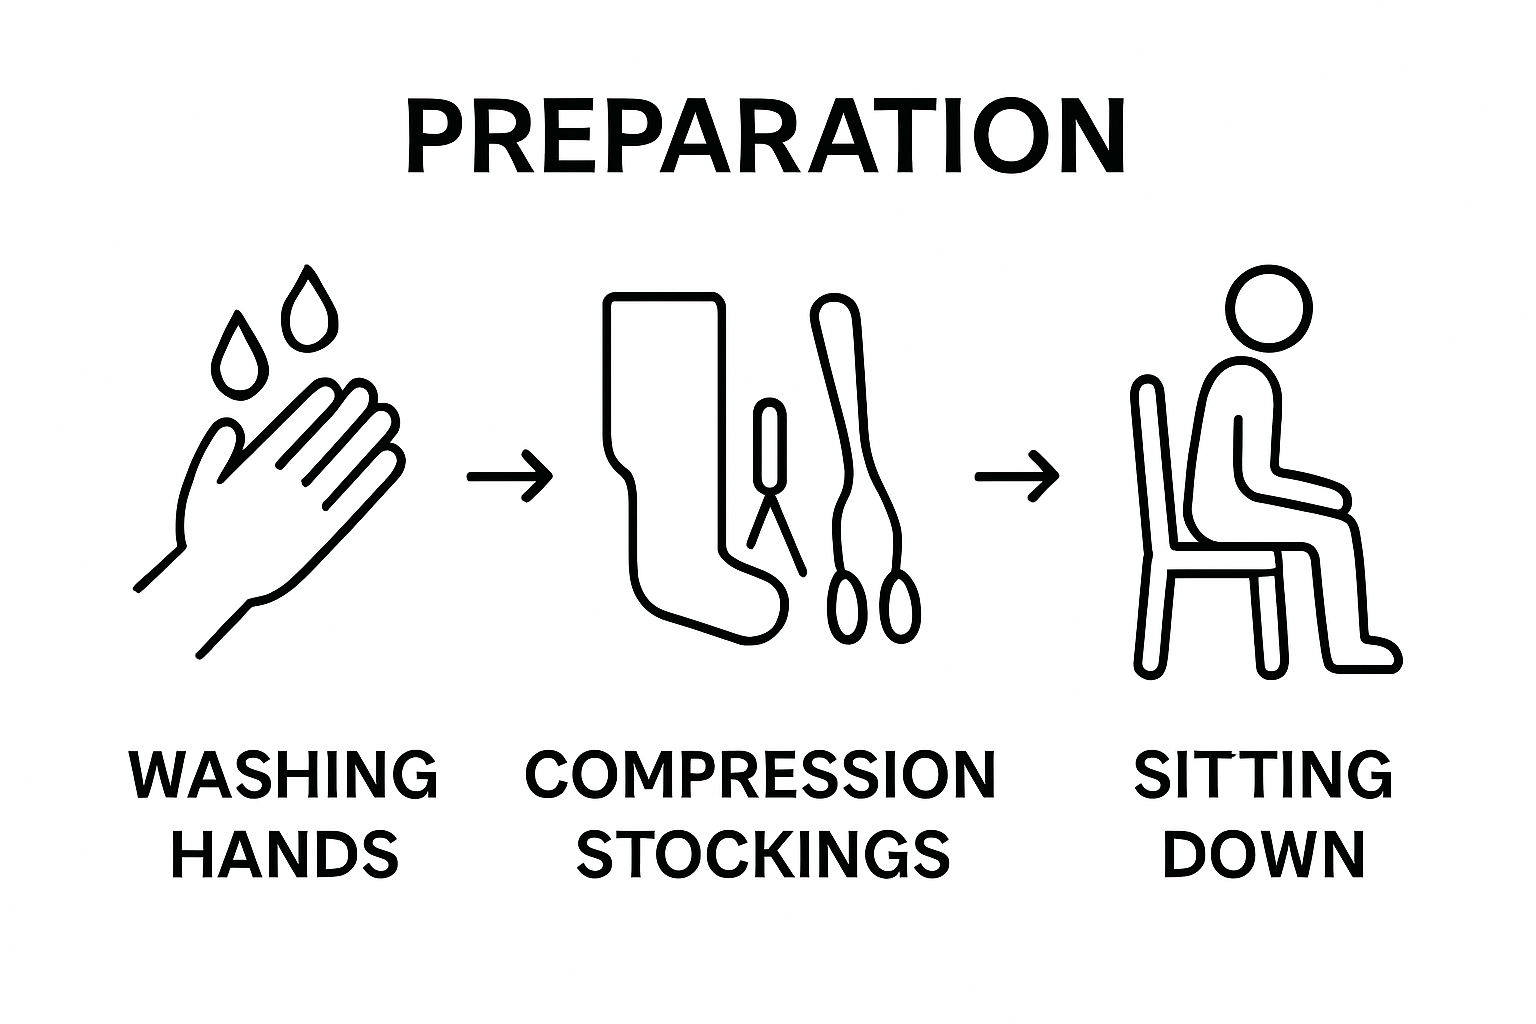
Step 1: Gather Your Materials and Prepare
Successfully putting on compression stockings begins with careful preparation and gathering the right materials. This initial step sets the foundation for a smooth, effective application that maximizes the therapeutic benefits of your compression garment.
Before starting, collect all necessary supplies to ensure a streamlined process. You will need clean, dry hands, your compression stockings, and a few additional items that can make application easier. Having everything within reach prevents interruptions and helps maintain the delicate fabric of your stockings.
The ideal preparation environment is a clean, well-lit area where you can sit comfortably. A sturdy chair with a smooth surface works best, providing stability while allowing you to manipulate the stockings without unnecessary strain. If you have mobility challenges, consider positioning the chair near a bed or using a supportive surface to help balance.
Key materials for putting on compression stockings include:
- Clean compression stockings (appropriate size and compression level)
- Gloves with a smooth texture (optional but recommended)
- Talcum powder or cornstarch (helps reduce friction)
- Smooth surface or chair for sitting
- Mirror (helpful for checking proper alignment)
Preparing your skin is equally important. Ensure your legs are completely dry before putting on the stockings. Any moisture can create friction and make application more difficult. If you use moisturizer, apply it well in advance and allow sufficient time for complete absorption. This prevents the stocking from sliding or bunching during application.
According to MedlinePlus medical guidance, checking your skin for any cuts, wounds, or areas of sensitivity before putting on compression stockings is crucial. This quick inspection helps prevent potential irritation and ensures safe, comfortable wear.
Take a moment to assess your physical comfort and readiness. If you experience pain, significant swelling, or recent surgical changes, consult your healthcare provider about the best approach to putting on your compression stockings. Some individuals might require specialized techniques or assistance.
With your materials gathered and environment prepared, you are now ready to move forward with applying your compression stockings effectively and safely.
This table summarizes the main materials and tools you may need when preparing to put on compression stockings, along with their purposes.
| Material/Tool | Purpose | Optional/Recommended |
|---|---|---|
| Clean stockings | Primary garment for compression therapy | Required |
| Gloves (smooth texture) | Help grip fabric, prevent snags, and ease application | Recommended |
| Talcum powder/cornstarch | Reduces friction, making stockings easier to slide on | Optional |
| Sturdy chair | Provides stability and comfortable seating | Required |
| Mirror | Assists with visual alignment and fit | Optional |
Step 2: Position Your Body Comfortably
Positioning your body correctly is a critical step in successfully putting on compression stockings. This phase sets the foundation for smooth application and ensures you can effectively manage the garment without unnecessary strain or discomfort.
Choose a location that provides stable, supportive seating with ample space to maneuver. A sturdy chair with a firm seat and ideally without armrests works best, allowing you complete freedom of movement. The height should enable you to comfortably reach your legs without excessive bending or twisting. If possible, position the chair near a bed or wall for additional support if needed.
Seating positioning requires careful consideration. Sit squarely in the chair with your back supported and feet flat on the floor. Maintain an upright posture that allows you to easily reach your legs without straining. If you have limited mobility or flexibility, consider sitting on the edge of the bed where you can extend your legs more comfortably.
Ergonomic positioning involves more than just sitting down. Ensure you have enough space around you to spread your legs slightly and manipulate the compression stocking without feeling cramped. Natural light can help you see details more clearly, so position yourself near a window or use a bright lamp to illuminate your workspace.
Key body positioning considerations:
- Back should be straight and supported
- Feet flat on the floor
- Legs slightly spread for easy access
- Minimal twisting or reaching required
- Comfortable and stable seating surface
According to Mayo Clinic recommendations, sitting in a stable chair helps prevent potential falls or loss of balance during stocking application. This advice underscores the importance of selecting the right seating and maintaining proper body alignment.
For individuals with limited mobility or those recovering from surgery, additional support might be necessary. Consider having a caregiver or family member assist you, or use assistive devices like grab bars or a raised seat to enhance stability. Some people find using a mirror helpful to check alignment and ensure proper stocking placement.
Pay attention to your body’s signals during positioning. If you experience pain, discomfort, or difficulty reaching your legs, adjust your position or seek assistance. Comfort and safety are paramount when putting on compression stockings.
With your body positioned correctly, you are now prepared to move forward with the next steps of compression stocking application, setting yourself up for a successful and comfortable experience.
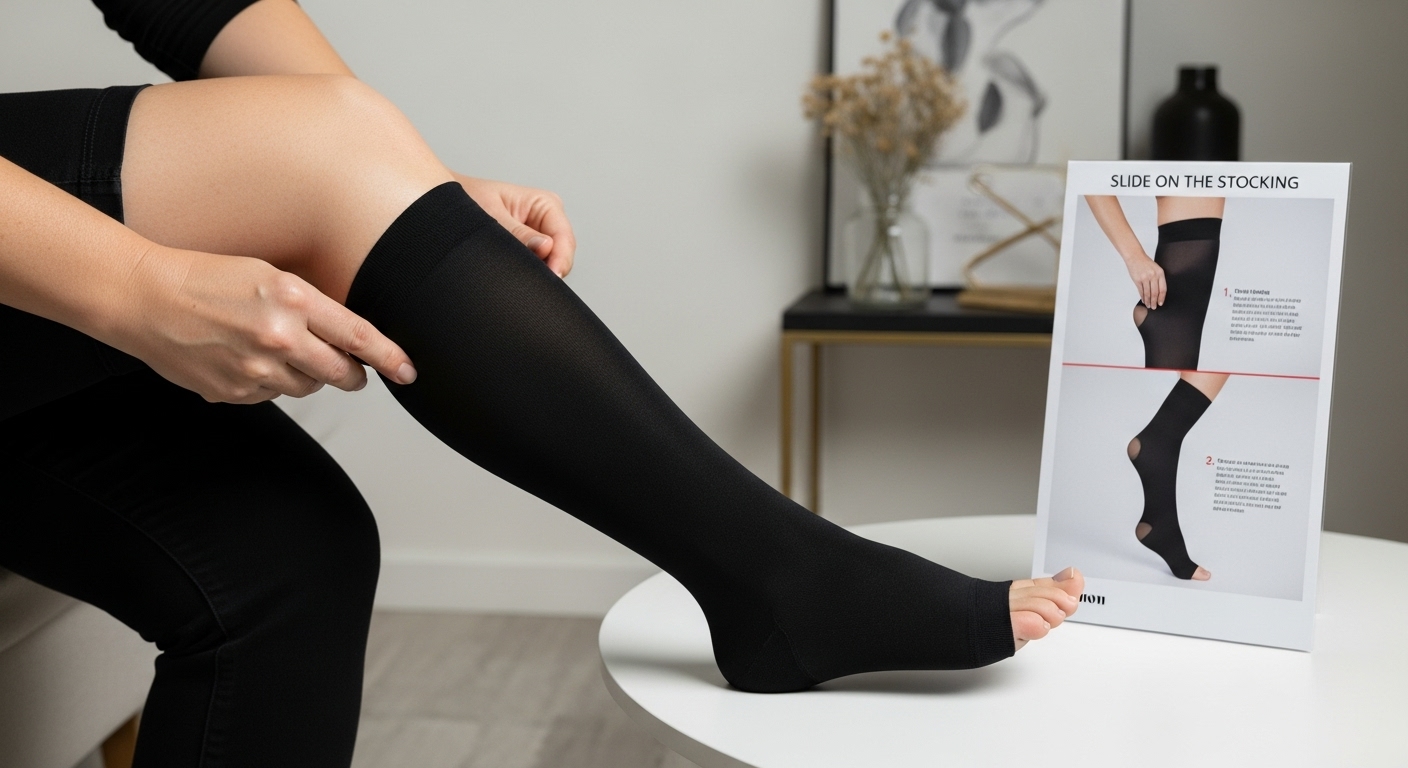
Step 3: Slide on the Stocking from Toe to Knee
Sliding on a compression stocking requires precision, patience, and a gentle touch. This critical step transforms your carefully prepared materials into a therapeutic garment that will support your leg’s circulation and comfort. Proper technique is essential to prevent fabric damage and ensure an effective fit.
Begin by gathering the entire stocking from top to bottom, creating a wide, loose opening. Hold the stocking with both hands, turning it inside out until you reach the heel pocket. This technique creates a smooth pathway for your foot and minimizes the risk of snagging or creating uncomfortable wrinkles.
Carefully place your foot into the stocking, focusing on positioning your heel correctly in the heel pocket. Wiggle your foot gently to ensure proper alignment, making sure your toes are comfortably situated at the stocking’s toe section. Avoid pulling or yanking, which can stretch or tear the delicate compression fabric.
Once your foot is in place, begin slowly unrolling the stocking upward. Use smooth, consistent motions to guide the fabric over your foot and ankle. Your movements should be deliberate but light, allowing the stocking to glide naturally against your skin. If you encounter resistance, pause and readjust rather than forcing the material.
Key sliding techniques to remember:
- Gather stocking completely before starting
- Position heel carefully in heel pocket
- Unroll smoothly from toe toward knee
- Avoid excessive pulling or stretching
- Adjust gently if fabric bunches
For those interested in mastering compression stocking application, understanding the nuanced approach makes a significant difference in comfort and effectiveness.
According to MedlinePlus medical guidance, the key is to slide the stocking up smoothly without creating wrinkles or folds that could interrupt proper compression. Take your time and remain patient with the process.
If you have swollen legs or find sliding challenging, consider using a special donning tool or asking for assistance. Some individuals find applying the stocking while lying down or using talcum powder helps reduce friction and makes the process smoother.
Verify your stocking’s placement by checking that it sits smoothly against your skin without twisting or bunching. The top of the stocking should rest comfortably just below the knee, providing consistent compression without cutting into your leg.
 With practice, this technique will become more natural and effortless.
Step 4: Adjust for Comfort and Fit
Adjusting your compression stocking for optimal comfort and fit is the final critical step in ensuring therapeutic effectiveness. This stage transforms a potentially uncomfortable garment into a supportive tool that enhances circulation and provides targeted leg support.
Smooth, even distribution is the key to proper compression stocking placement. Begin by running your hands gently along the length of the stocking, eliminating any wrinkles or folds that might create uneven pressure points. Pay special attention to the ankle and calf areas, where fabric tends to bunch or create uncomfortable creases.
Carefully examine the stocking’s position relative to your leg. The top edge should sit smoothly just below the knee, without digging into your skin or creating tight bands that could restrict circulation. Check for symmetry by ensuring the stocking looks and feels consistent on both sides of your leg. Slight adjustments might be necessary to achieve the perfect alignment.
For those who find precise fitting challenging, our comprehensive guide to measuring compression stockings can provide additional insights into achieving the right fit.
Key comfort verification points:
- No visible wrinkles or bunching
- Smooth transition from ankle to calf
- Top edge sits comfortably below knee
- No excessive tightness or pinching
- Consistent compression throughout
According to MedlinePlus medical guidance, proper stocking adjustment is crucial to prevent potential skin irritation and ensure therapeutic compression remains effective. Take your time during this step, understanding that minor adjustments can significantly impact your comfort and the stocking’s performance.
If you experience persistent discomfort or notice the stocking feels uncomfortable after adjustment, do not force it. Remove the stocking and start again, or consult with a healthcare professional to ensure you have the correct size and compression level.
Move your leg gently to test the stocking’s fit and comfort. Walk around, flex your ankle, and sit down to ensure the stocking moves with your body without sliding or creating uncomfortable pressure points. A well-fitted compression stocking should feel snug but not restrictive, providing gentle support throughout your daily activities.
Remember that initial application can be challenging, and your technique will improve with practice. Each time you put on your compression stockings, you’ll become more confident and efficient in achieving the perfect fit.
Step 5: Verify Proper Placement and Compression
Verifying proper placement and compression is the final checkpoint in ensuring your compression stockings provide maximum therapeutic benefit. This crucial step transforms your careful application into an effective support mechanism for your legs, preventing potential circulation issues and promoting overall leg health.
Visual and tactile inspection becomes your primary tool for verification. Start by standing in front of a full-length mirror or asking a trusted companion to help you assess the stocking’s fit. Look for uniform, smooth coverage from your toes to just below your knee. The stocking should appear seamless, without visible bunching or twisting that could interrupt consistent compression.
Run your hands along the length of the stocking, feeling for any irregularities. Subtle pressure should be consistent throughout the garment. Pay special attention to the ankle and calf areas, where compression is most critical. The stocking should feel snug but not painfully tight, creating a gentle, supportive embrace around your leg.
For those seeking additional guidance, our comprehensive measuring guide offers extra insights into achieving the perfect fit and understanding compression levels.
Key verification points to check:
- Smooth fabric without wrinkles
- Consistent pressure from toe to knee
- No cutting or pinching at top edge
- Fabric sits evenly against skin
- No visible rolling or sliding
According to MedlinePlus medical guidance, improper placement can significantly reduce the therapeutic effectiveness of compression stockings. Take your time during this verification process, understanding that a few extra moments of careful checking can prevent potential discomfort or health complications.
Move around to test the stocking’s performance. Walk a few steps, sit down, and stand up again. The stocking should move with your body, maintaining its position without sliding down or creating uncomfortable pressure points. If you notice any significant movement or discomfort, remove the stocking and reapply, ensuring you have the correct size and application technique.
Here is a checklist table to help you verify that your compression stockings are applied correctly and comfortably every time.
| Verification Step | How to Check | Reason |
|---|---|---|
| Fabric sits smoothly | Use a mirror or feel with your hands for any wrinkles or bunching | Prevents uneven compression and discomfort |
| Consistent pressure | Gently run your hands from toe to knee, checking for snug but not tight sections | Ensures effective and safe therapeutic pressure |
| No pinching at top edge | Confirm the top band rests gently below the knee without digging in | Avoids restricted circulation and irritation |
| Even coverage from toe to knee | Visually inspect or use a mirror to check for complete uniform fabric coverage | Promotes proper compression and support |
| No rolling or sliding | Move, walk, or sit to test stocking remains in place without movement | Maintains proper function throughout activities |
| No skin redness or irritation | Remove stocking and check for unusual marks or discomfort on your skin | Protects skin and signals correct fit |
Pay attention to your skin’s response. Immediately after application, check for any unusual redness, indentation, or discomfort that might indicate incorrect sizing or application. Healthy compression should feel supportive, not restrictive. If you experience persistent discomfort or notice skin changes, consult with a healthcare professional to reassess your compression stocking fit.
Remember that mastering compression stocking application is a skill that improves with practice. Each time you put them on, you’ll become more confident in achieving the perfect placement and compression.
Find Your Perfect Compression Stockings Solution at Fit Stockings
Putting on compression stockings can be a struggle, especially if you are dealing with swelling, sensitive skin, or limited flexibility. The step-by-step guide you just read outlines how important it is to have a well-fitted, high-quality garment, avoid discomfort, and minimize frustration with slipping or bunching. If you want to experience real support and comfort during your daily routine, choosing the right products is key.
Take the guesswork out of your next purchase. Browse our trusted Jobst selection or explore the full range of compression stockings for every need, from mild support to medical-grade solutions. With detailed sizing help, free shipping, and easy returns at Fit Stockings, now is the perfect time to upgrade your therapy experience. Shop with confidence and take the first step toward healthier legs today.
Frequently Asked Questions
How do I properly prepare my legs before putting on compression stockings?
Make sure your legs are completely dry, and check for any cuts or sensitivities. If you use moisturizer, apply it well in advance and allow it to fully absorb.
What is the best way to slide on compression stockings?
Begin by gathering the stocking from top to bottom and turning it inside out until you reach the heel pocket. Carefully place your foot into the stocking, ensuring your heel is properly positioned, and then slowly unroll the stocking upward.
How can I ensure my compression stockings fit correctly?
After putting on the stockings, check for smooth coverage with no wrinkles. The top should sit just below the knee without digging into your skin. Make adjustments as needed for a comfortable fit.
What should I do if I experience discomfort while wearing compression stockings?
If you notice persistent discomfort or unusual skin reactions after putting on the stockings, remove them and reapply, or consult with a healthcare professional for advice on sizing and fit.
Recommended
- Compression Stockings Fitting Guide 2025: Find the Perfect Fit – Fit Stockings
- The Ultimate Guide to Compression Stockings: Comfort, Health, and Styl – Fit Stockings
- Measuring for Compression Stockings: Easy Steps for Better Support in – Fit Stockings
- How to Put On and Take Off Compression Stockings: Tips for Easy Applic – Fit Stockings